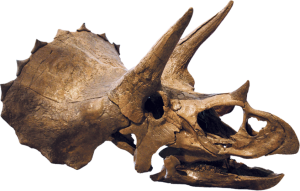
I found many Internet sites that show scenes of how to prep a fossil bone, but these do not tell the whole story. They do not fully reveal the intensity and time-consuming detail work that fossil prep requires. It takes an enormous amount of patience and practice.
It is difficult to prep those surface areas covered with stubborn iron concretions without damaging the fossil veneer beneath. I admire the skill of those who can. I am better suited for the fossil reconstruction that I describe in the next section. All in all, I would rather spend my time outdoors searching for more fossils.
I will share what I practice after spending hours watching a professional colleague who has over 30 years prep experience including work on Peck’s Rex. We can break down the prep work into stages.
Stage 1 Stabilize
Stage 2 Air Scribe work
Stage 3 Soda Blasting
Stage 4 Crack Filling
Stage 5 Soda Blasting
Stage 6 Final Filling and Touch up
Stage 1
STABILIZE STABILIZE STABILIZE
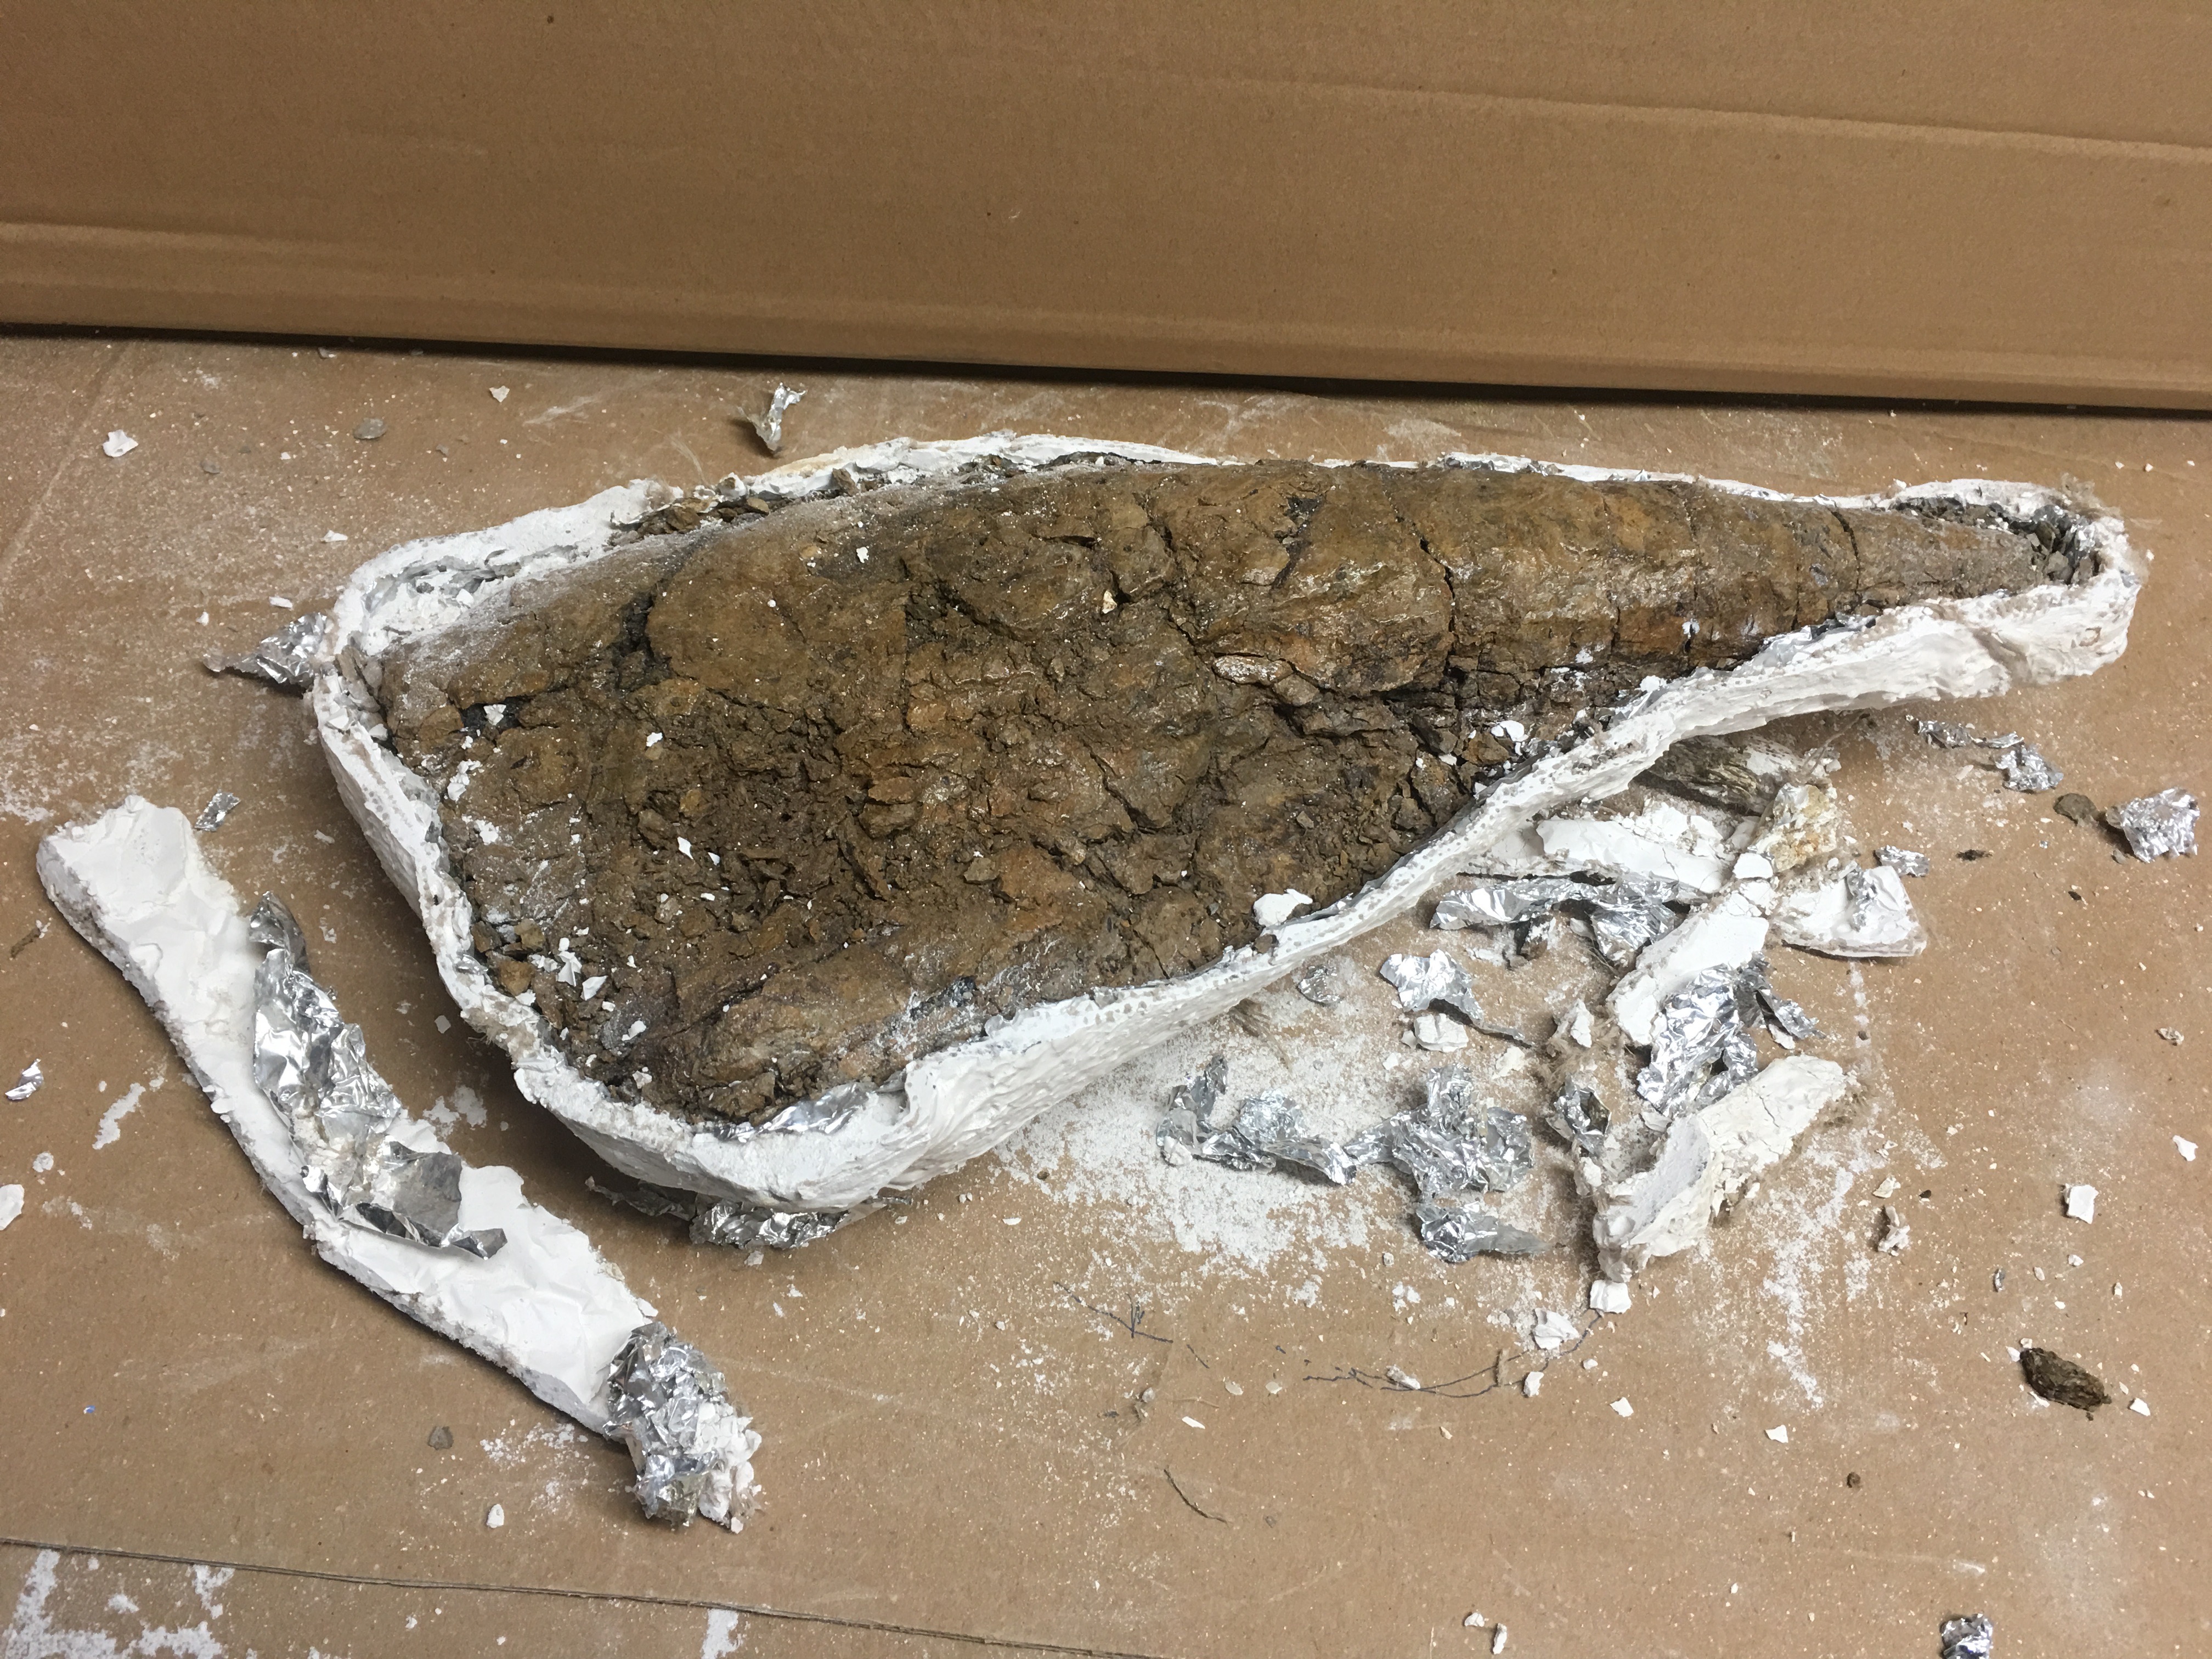
I try to stabilize the entire specimen as it came from the field including the matrix and part of the cast. I first open the cast and where possible remove bulk matrix from the cast down to near the bone surface. The cast can be cut down from a bowl shape to almost a plate as long as the fossil remains stable.
Make sure your fossil is dry before you stabilize. I have opened casts and found my fossil was still so moist that it felt more like damp leather rather than stone, I first removed portions of the cast and let the fossil dry out before I attempted to stabilize. Unfortunately this drying created wider and deeper cracks in the fossil surface. My mistake was that I set it out in direct sunlight to speed up the process….Oops!. I was in a hurry. I later was advised to let a wet fossil dry slowly.
I develop a tank or pail of acetone and PVA at 5% (Poly Vinyl Acetate). Whichever type of resin you use to stabilize you should keep the viscosity low enough to penetrate the cracks. Too thick and it will not penetrate small cracks. You just create a tough outer skin, which then you will remove in the blasting Stage 3.
Place the specimen on a draining rack with handles. Submerge the specimen in the PVA solution and let it soak in until the bubbling stops. This should only take a few minutes. Lift the rack and let the specimen drain and dry out. The dry time will depend on the size of he specimen and the temperature. If this procedure is not possible, then pour the PVA solution over the specimen as it remains in the cast frame. Try to create a drain hole in the underside of the cast.
When the fossil does not fit my resin tank I place the fossil in a thick plastic bag and add the solution on top. I support and squeeze the plump bag of fluid until it covers the top of the fossil. The sides need to be supported or the fluid will just create a pouch at the bottom and sides. You can make a fossil sized well in dirt, sand or other material. Place the fossil in the bag, and place the bag in the well. Then, most of the fluid will stay on or in the fossil and cast. This takes more effort but it can be done with much less fluid volume.


A fossil stabilized in this manor will take a long time to dry out. Do not sit the fossil out in the sun to speed up the process as I have mistakenly done. If it drys too fast the PVA at the surfaces may skin over and retard the evaporation of the acetone from internal layers. Too much PVA buildup in the top layers can be a barrier to further treatments. I dig around the fossil to open up pores or move some of the stabilized matrix, which may be damp and gummy the next day. After a few days I also remove more of the cast edging to see if the underside has dried out.
CAUTION: If you submerge an unsupported specimen for long periods of time you will also loosen CA glue you used to stabilize the specimen in the field. The glue joint you made may weaken and fail as it is exposed to the acetone. You will end up with the same stack of loose fossil chips you tried to stabilize in the field. Yes!, I have made this mistake. Try to support the specimen with the matrix in which it was recovered and the cast.
Stage 2
The specimen should now be much more stable and you can go to work to remove the remaining matrix and uncover the fossil. You will have also stabilized some matrix, which you will need to remove. This is the nature of the operation and a trade off between the catastrophic failure of a specimen and the extra effort in removing matrix.
Start with the gentlest tool first. If this does not do the work then move up to a more aggressive removal tool. Why use a hammer when a toothpick will do. Most prep labs use air scribes to remove the majority of the matrix. Some popular air scribes include the following:
The Stone Company http://www.stonecompany.com/tools/GermanTools.pdf
Paleo Tools https://www.paleotools.com/
Chicago Pneumatic https://www.cp.com/en-us/tools/products/percussivetools/engraving-pens/cp9361
Dnsons Aro Model https://www.dnsons.co.uk/home
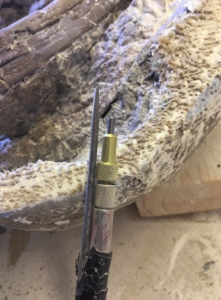
The matrix is always different. Some is so soft you could easily rub it off and some are extremely hard. I have had fossils incased in an iron concretion, and when I used the scribe, some of the bone fragments began to move or fly out due to the vibration. The stabilizing solution never got to the surface of the bone. I replace the chip with CA glue and go to the blaster. I find there is always a point where further air scribe work will only damage the fossil. If so, it is time to remove the remaining matrix with a Micro Blaster.
Stage 3
Sodium Bicarbonate is a common abrasive used on fossils. Many use a variety of more aggressive and harder media including various sizes of Aluminum oxide. These will remove stubborn matrix faster than soda but they are also less forgiving and will strip out and etch more bone in the process. Soda takes longer, but it is safer.
There are many small stream blasting systems including:
Comco Inc. Microblaster models https://www.comcoinc.com/wp-content/uploads/2016/07/MicroBlaster-Brochure.pdf
Crystal Mark Swam Blaster https://www.crystalmarkinc.com/all-products/swam-blaster-micro-abrasive-blasters/ This unit tends to produce an uneven stream. Stream is best when you first press on the foot pedal. Then the performance tapers off. You tend to keep pressing the peddle over and over to keep in the best removal stream.
Vaniman, Duel Tank Sandstorm Systems https://www.vaniman.com/ Also JSP Precision Dual pen blaster. These are geared for the Dental Lab trade, but they work find on fossils.
Hunter Products, MicroJet http://www.hunterproducts.com/micro_jet.html. This unit is difficult and time consuming to open and recharge.
Glastar Micro Abrasion http://www.glastar.com/catalog/sandblasting/micro_abrasive_blaster.cfm
A charge of soda may only last 15-20 minutes depending on the airflow, the canister capacity and blaster model. It does not take long to realize the importance of the recharge cycle. If the unit is difficult to open and recharge, you will get frustrated and loose work speed.
If you buy sodium bicarbonate in small boxes or in large bags it is usually lumpy. Get a standard kitchen sifter and sift each charge to help prevent your system from clogging. It is critical to use clean dry air. You may want to have multiple types of filtering and drying systems in series in your air supply line from the compressor to your blaster. If the air is damp the bicarbonate will clog up and you will likely need to dismantle everything to clean it out.
Try to start blasting on a patch of clean bone and work to expand the spot, or start on one end and work down to the bone, and then slowly move to the other end over time. Try to avoid skipping around. Focus the steam under the edge and undercut the matrix. Often this will create an overhang lip that can then be chipped off. It can be helpful to tape a chipping blade or pick to the underside of the blasting nozzle. I let the tool extend about 1/2 inch beyond the tip of the nozzle.
If I have hard matrix, I may start with the Aluminum oxide to remove the matrix down closer to the bone and then switch to the sodium bicarbonate. To remove all of the matrix you will invariably have some fossil surface etching and remove perhaps 0.01 inch of bone, or about the thickness of two sheets of paper.
On common specie specimens of no scientific importance I sometimes stay with the air scribe to remove almost all of stiff matrix. The vibrations of the scribe can leave many very small divots in the surface of the bone. These are noticeable under a 10X glass but not to the naked eye. I then go over the same surface with the soda blaster and those divots fly away. The surface appears as if I had removed the matrix only with the soda. This is a much faster process and I cannot tell the difference. This represents a very small change to me and is not be recognizable on the surface of a three-foot Tibia.
Stage 4
I try to fill the fractures and cracks without hiding the roughed natural features of the fossil. There are many filling materials including plasters, putties, and epoxies. Here I use of a two-part epoxy putty from Aves called Apoxy.
I blend equal portions of the two epoxy components. Mix by hand until blended. I choose to roll each component out into a 1/4 inch diameter rope. I join the two ropes and roll them out together. I roll up the combined rope like a cinnamon roll and then roll it out into a rope again. After 5-6 cycles, they are well blended.

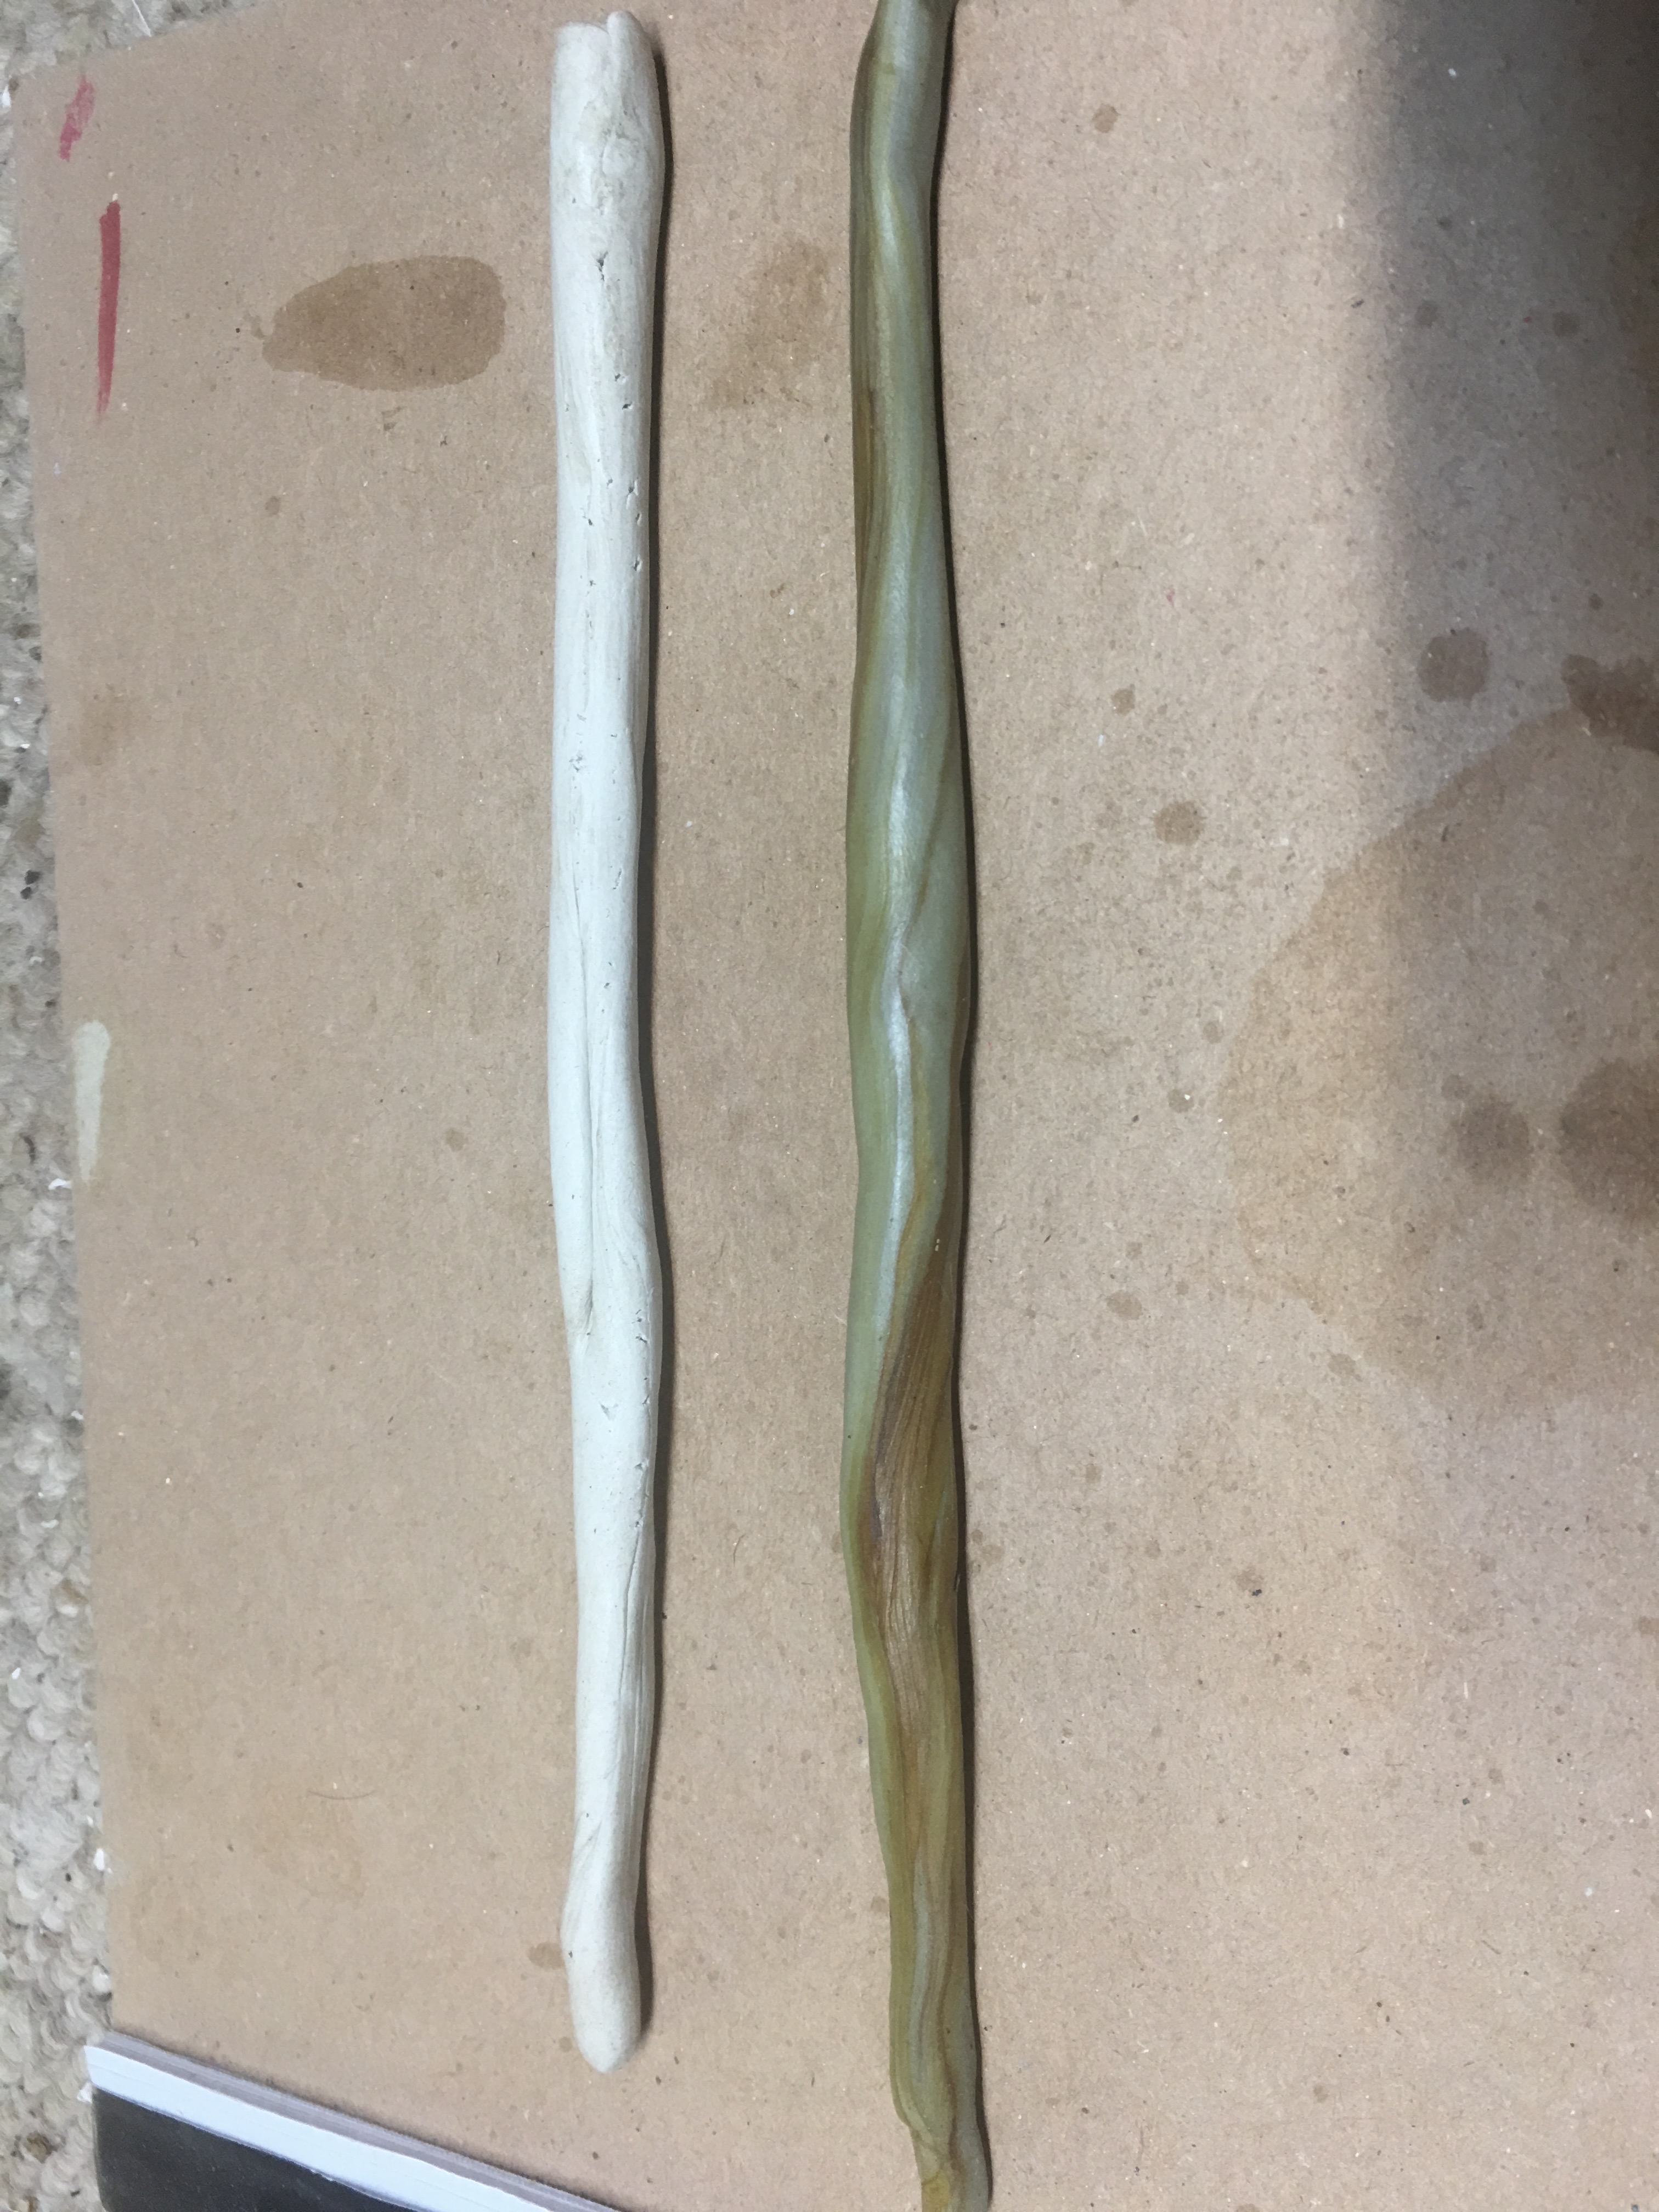
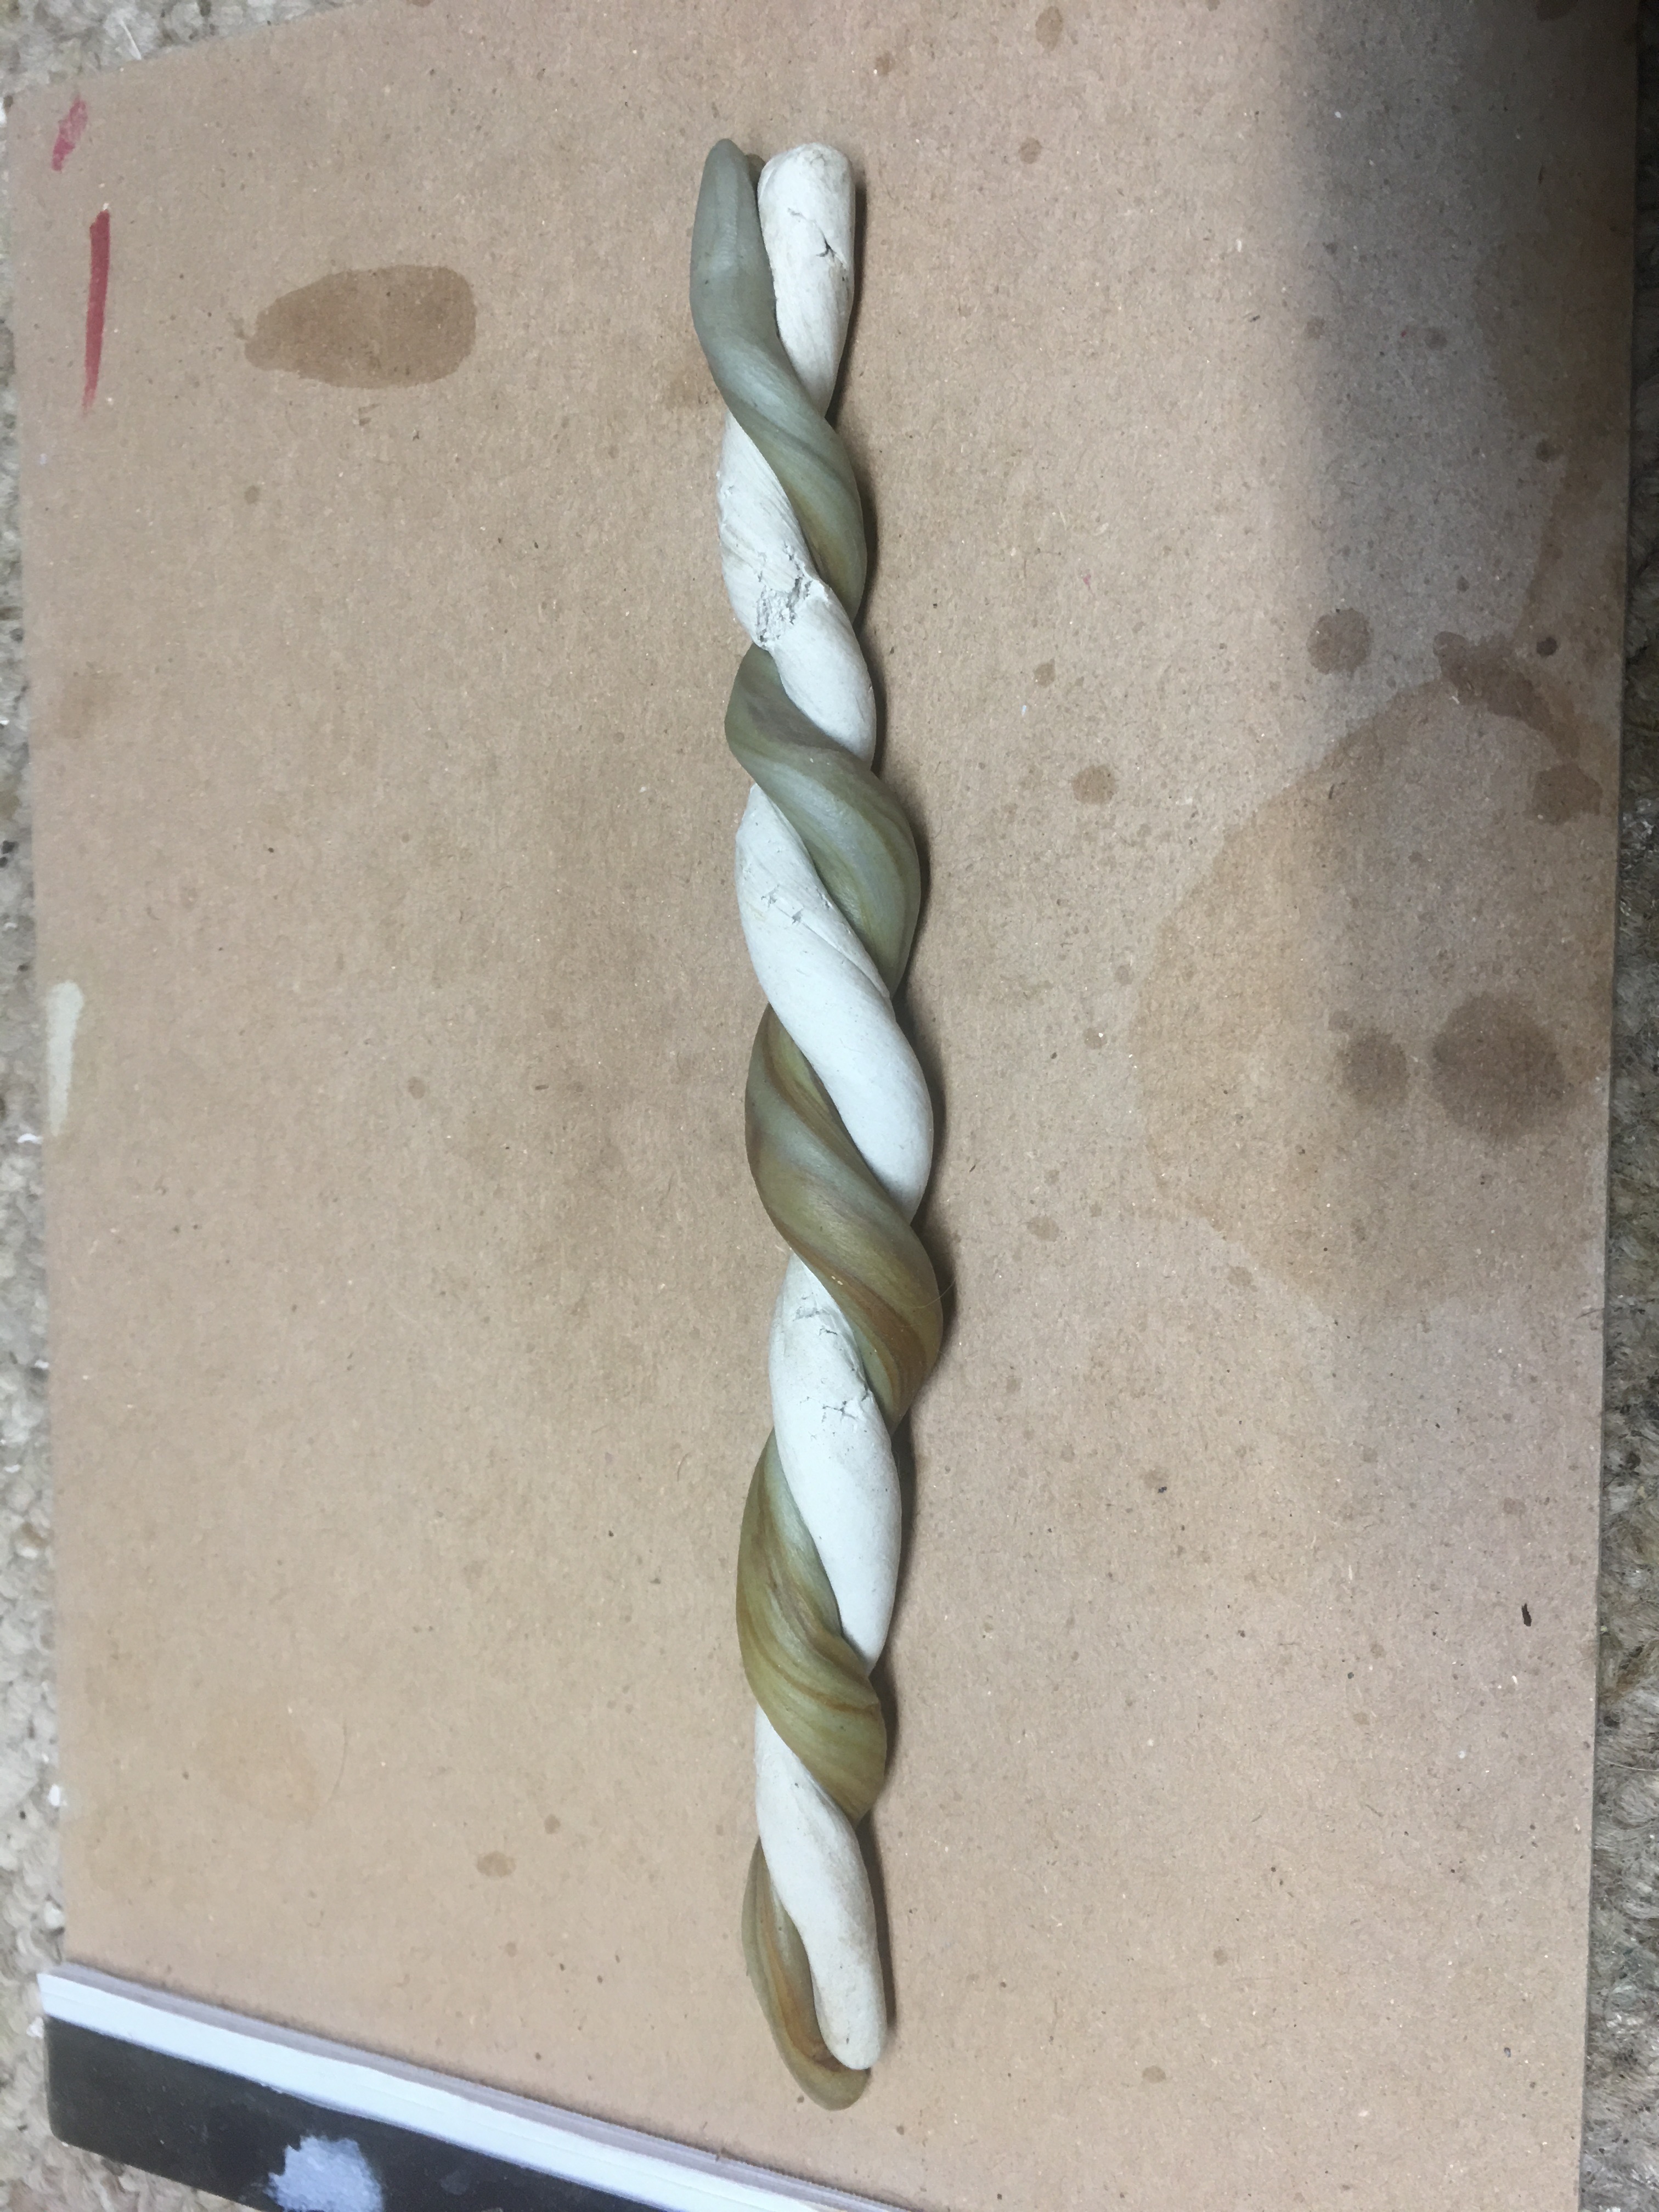
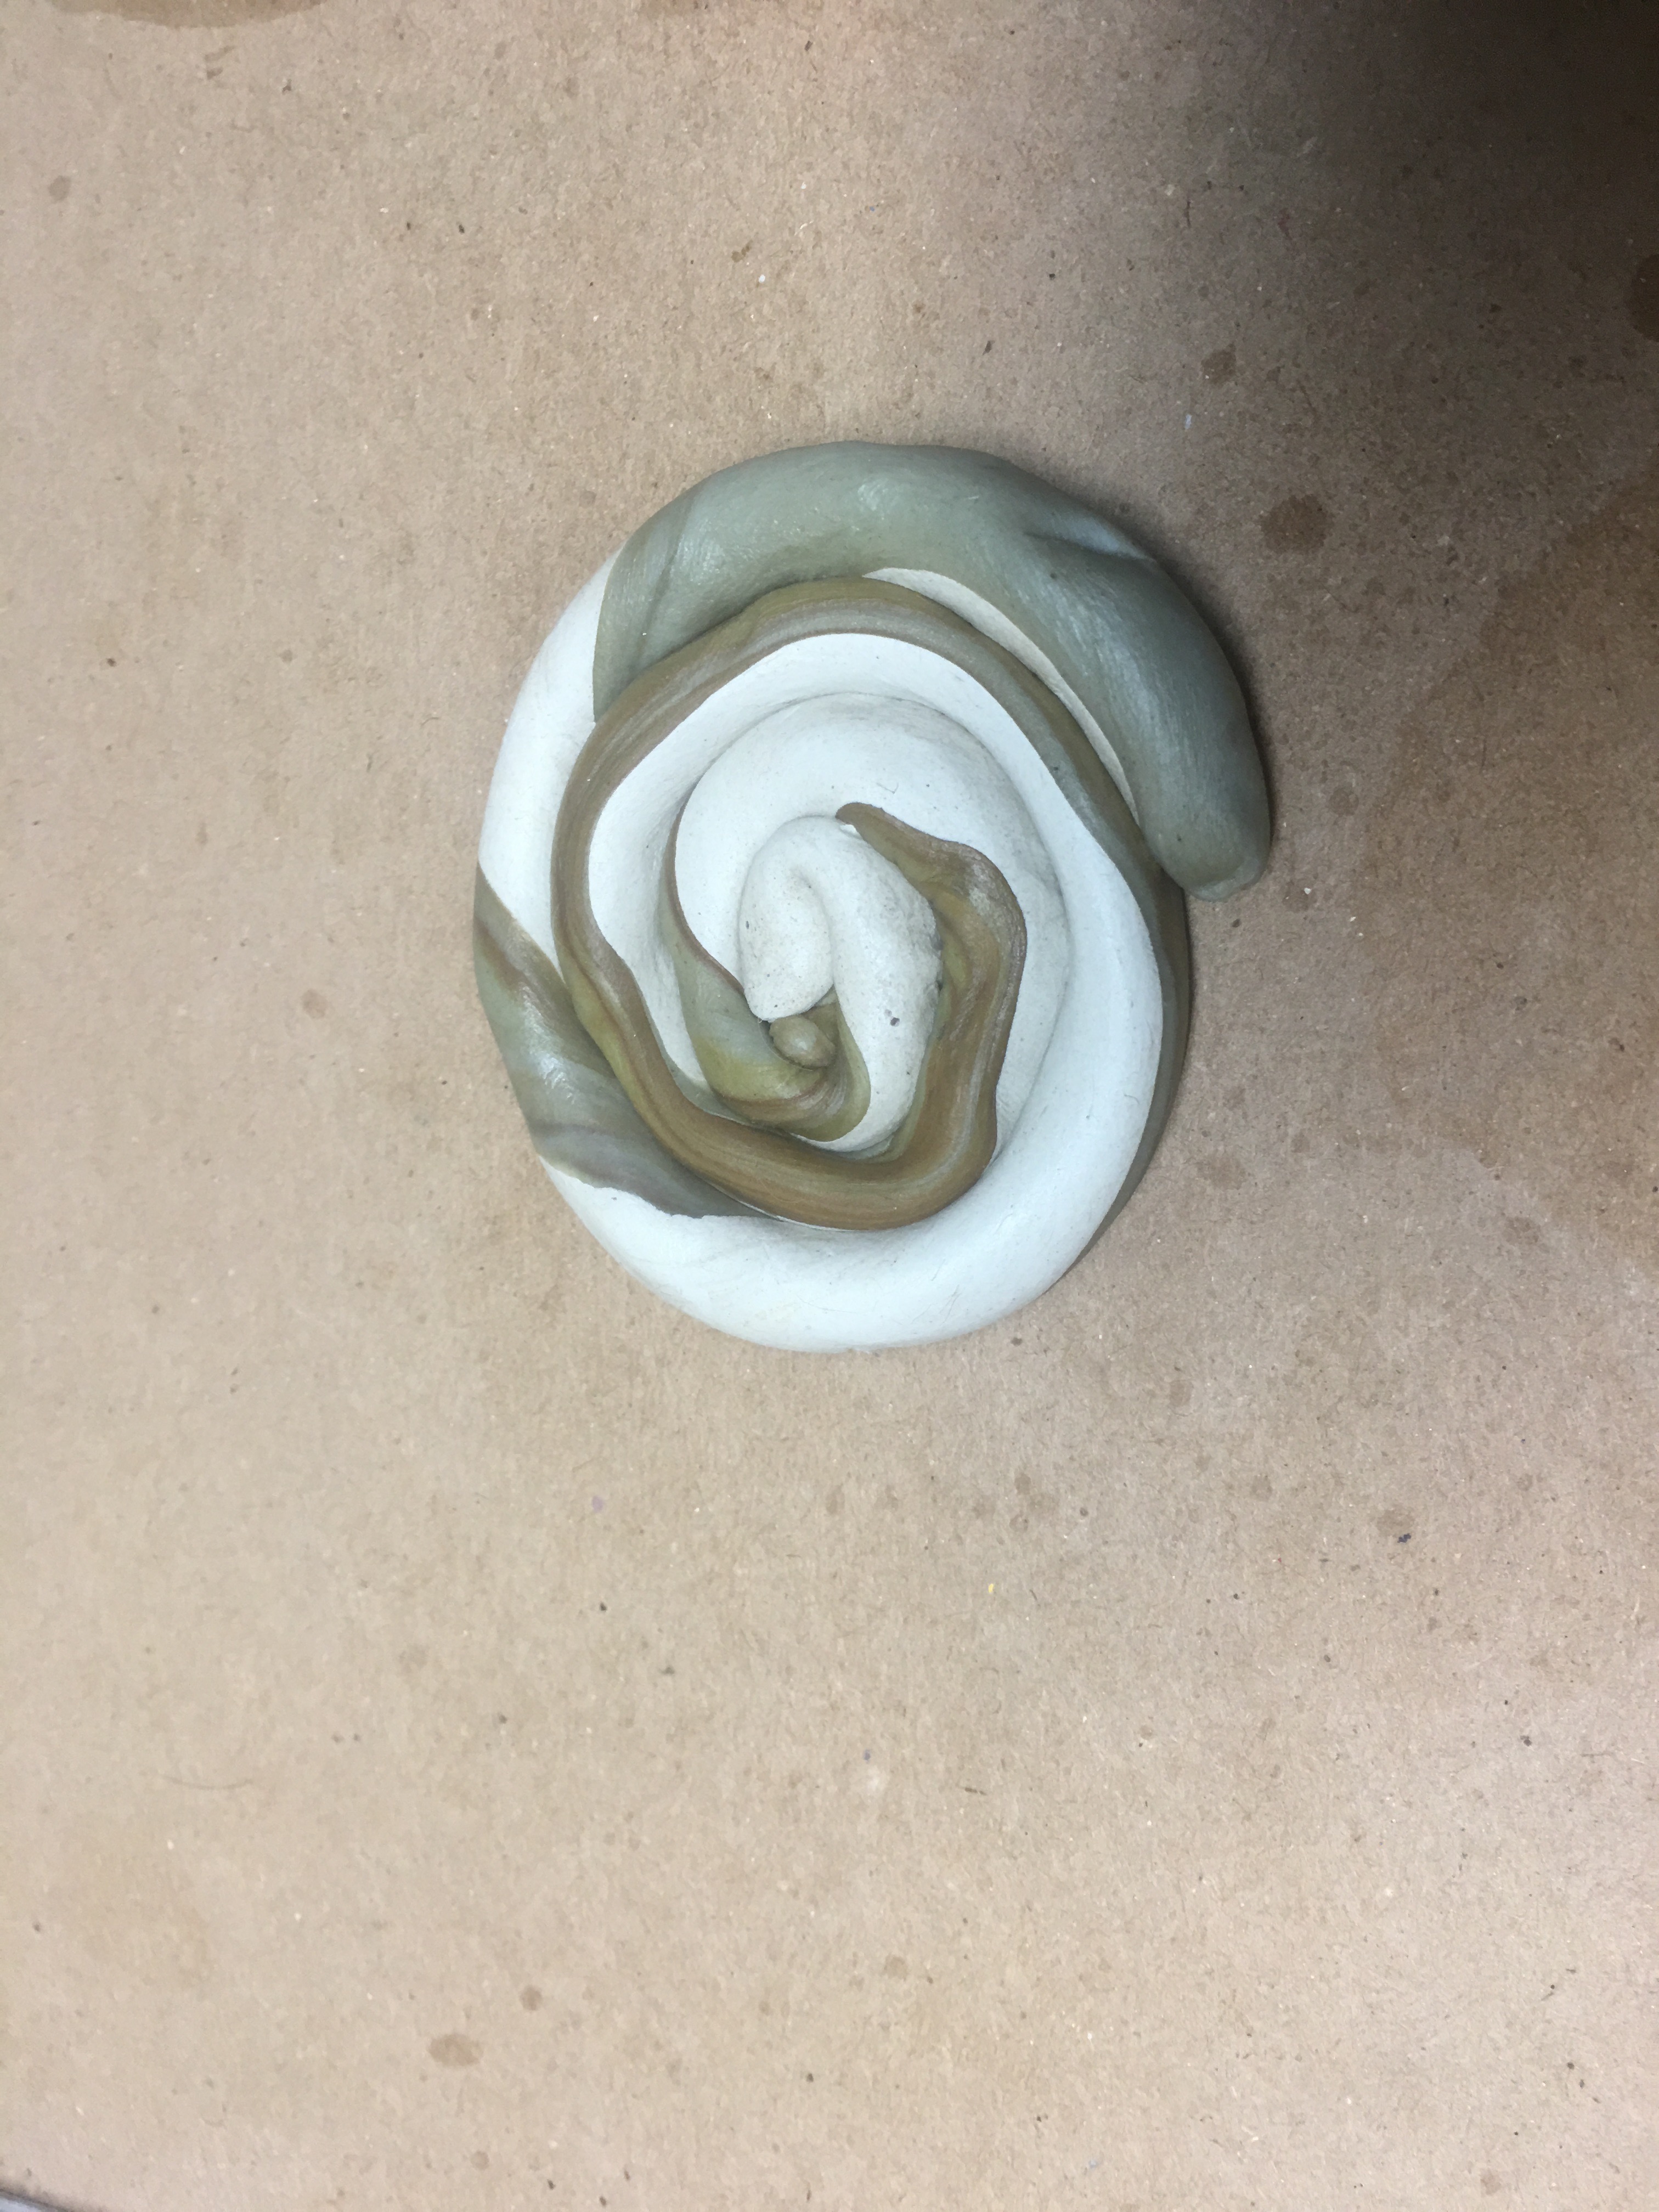
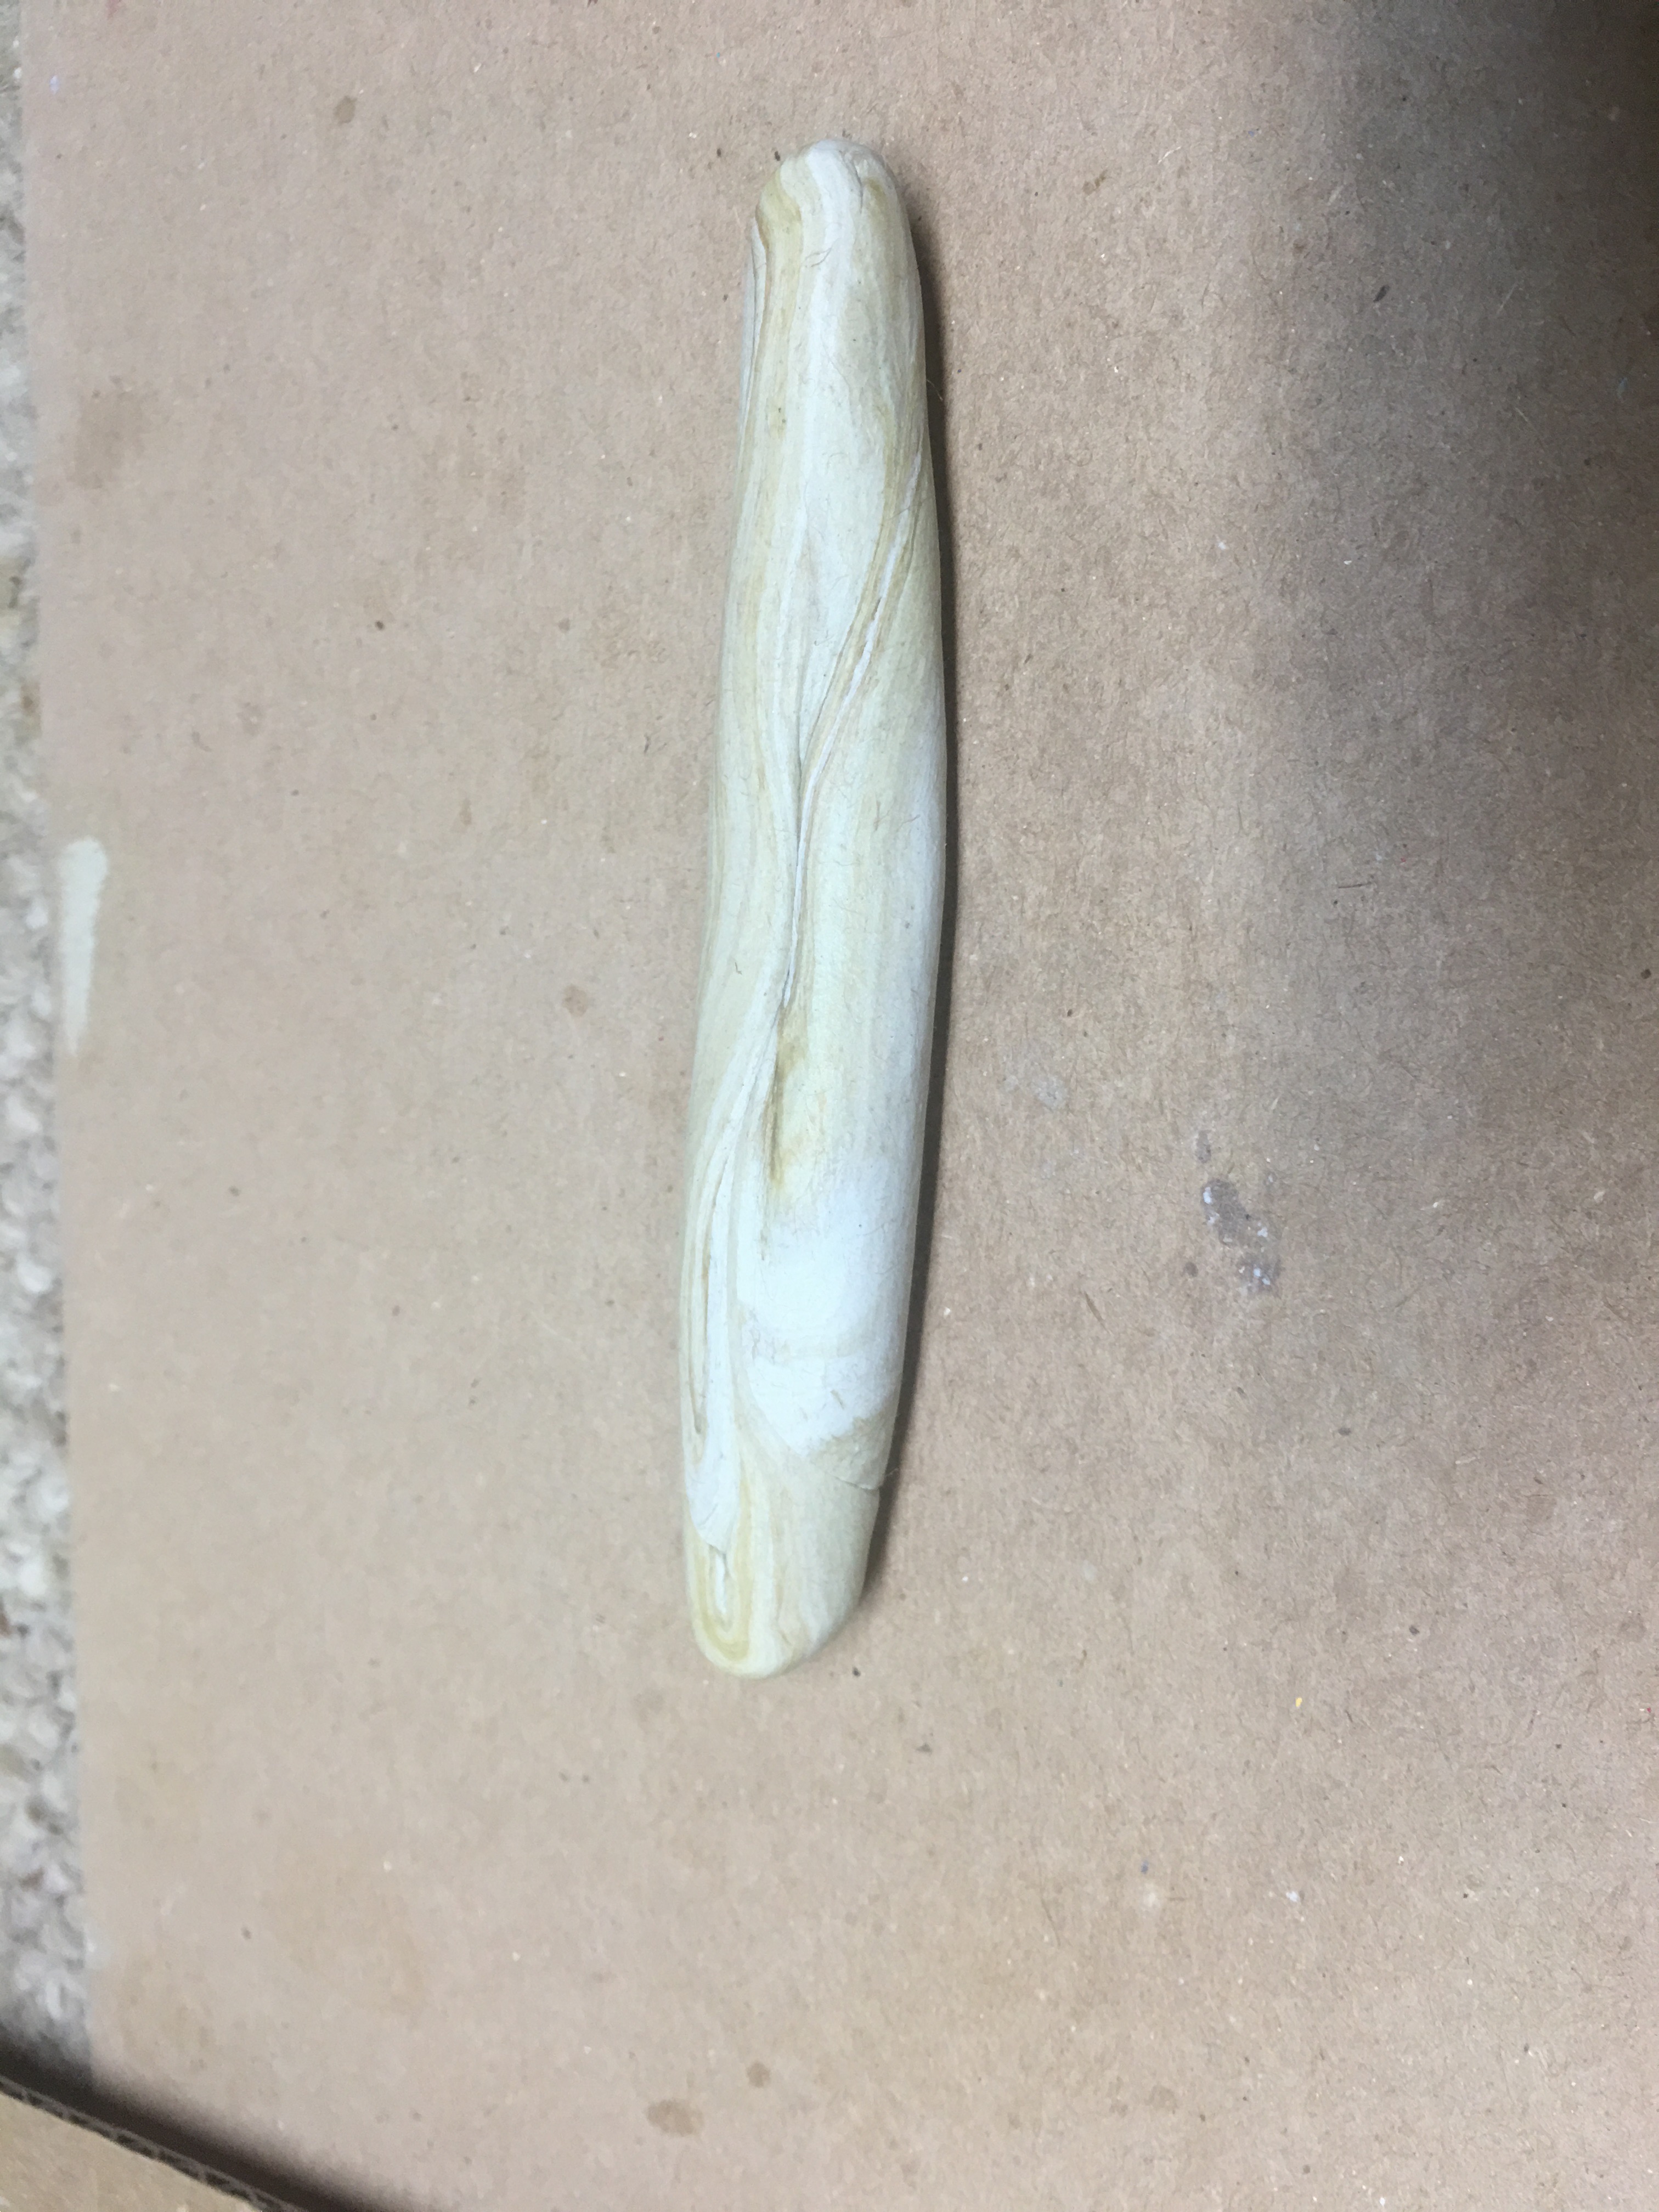
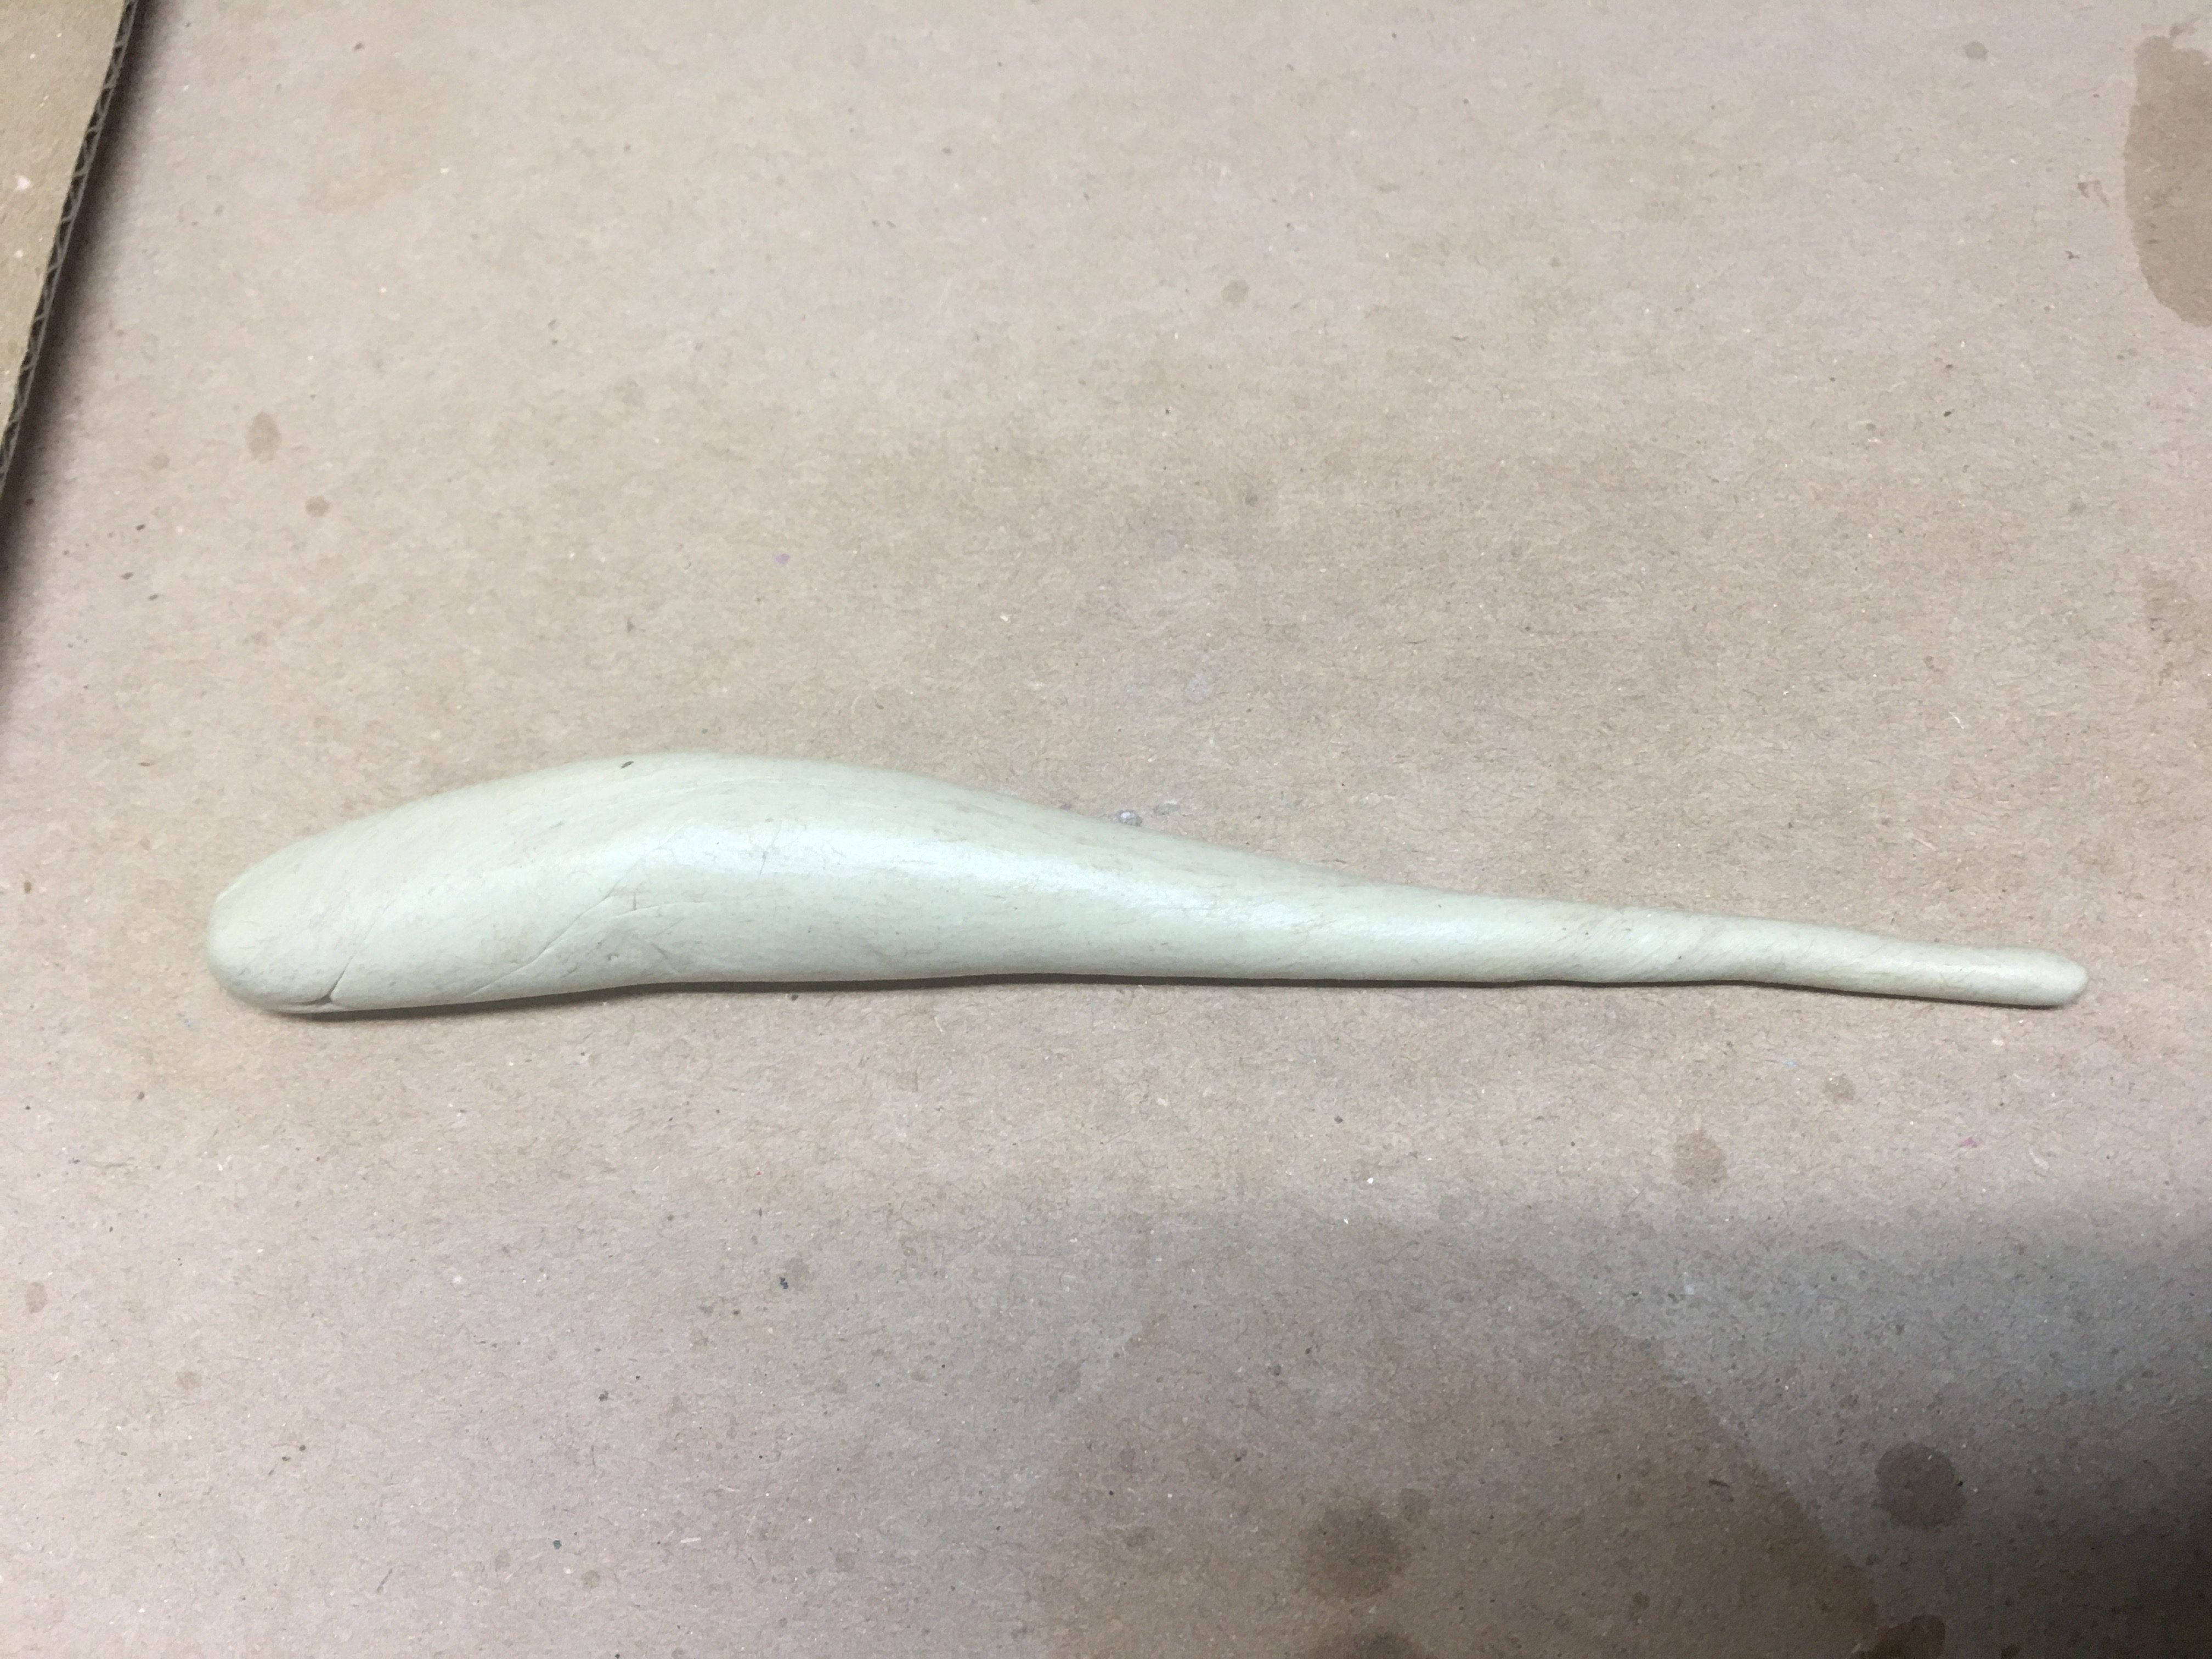
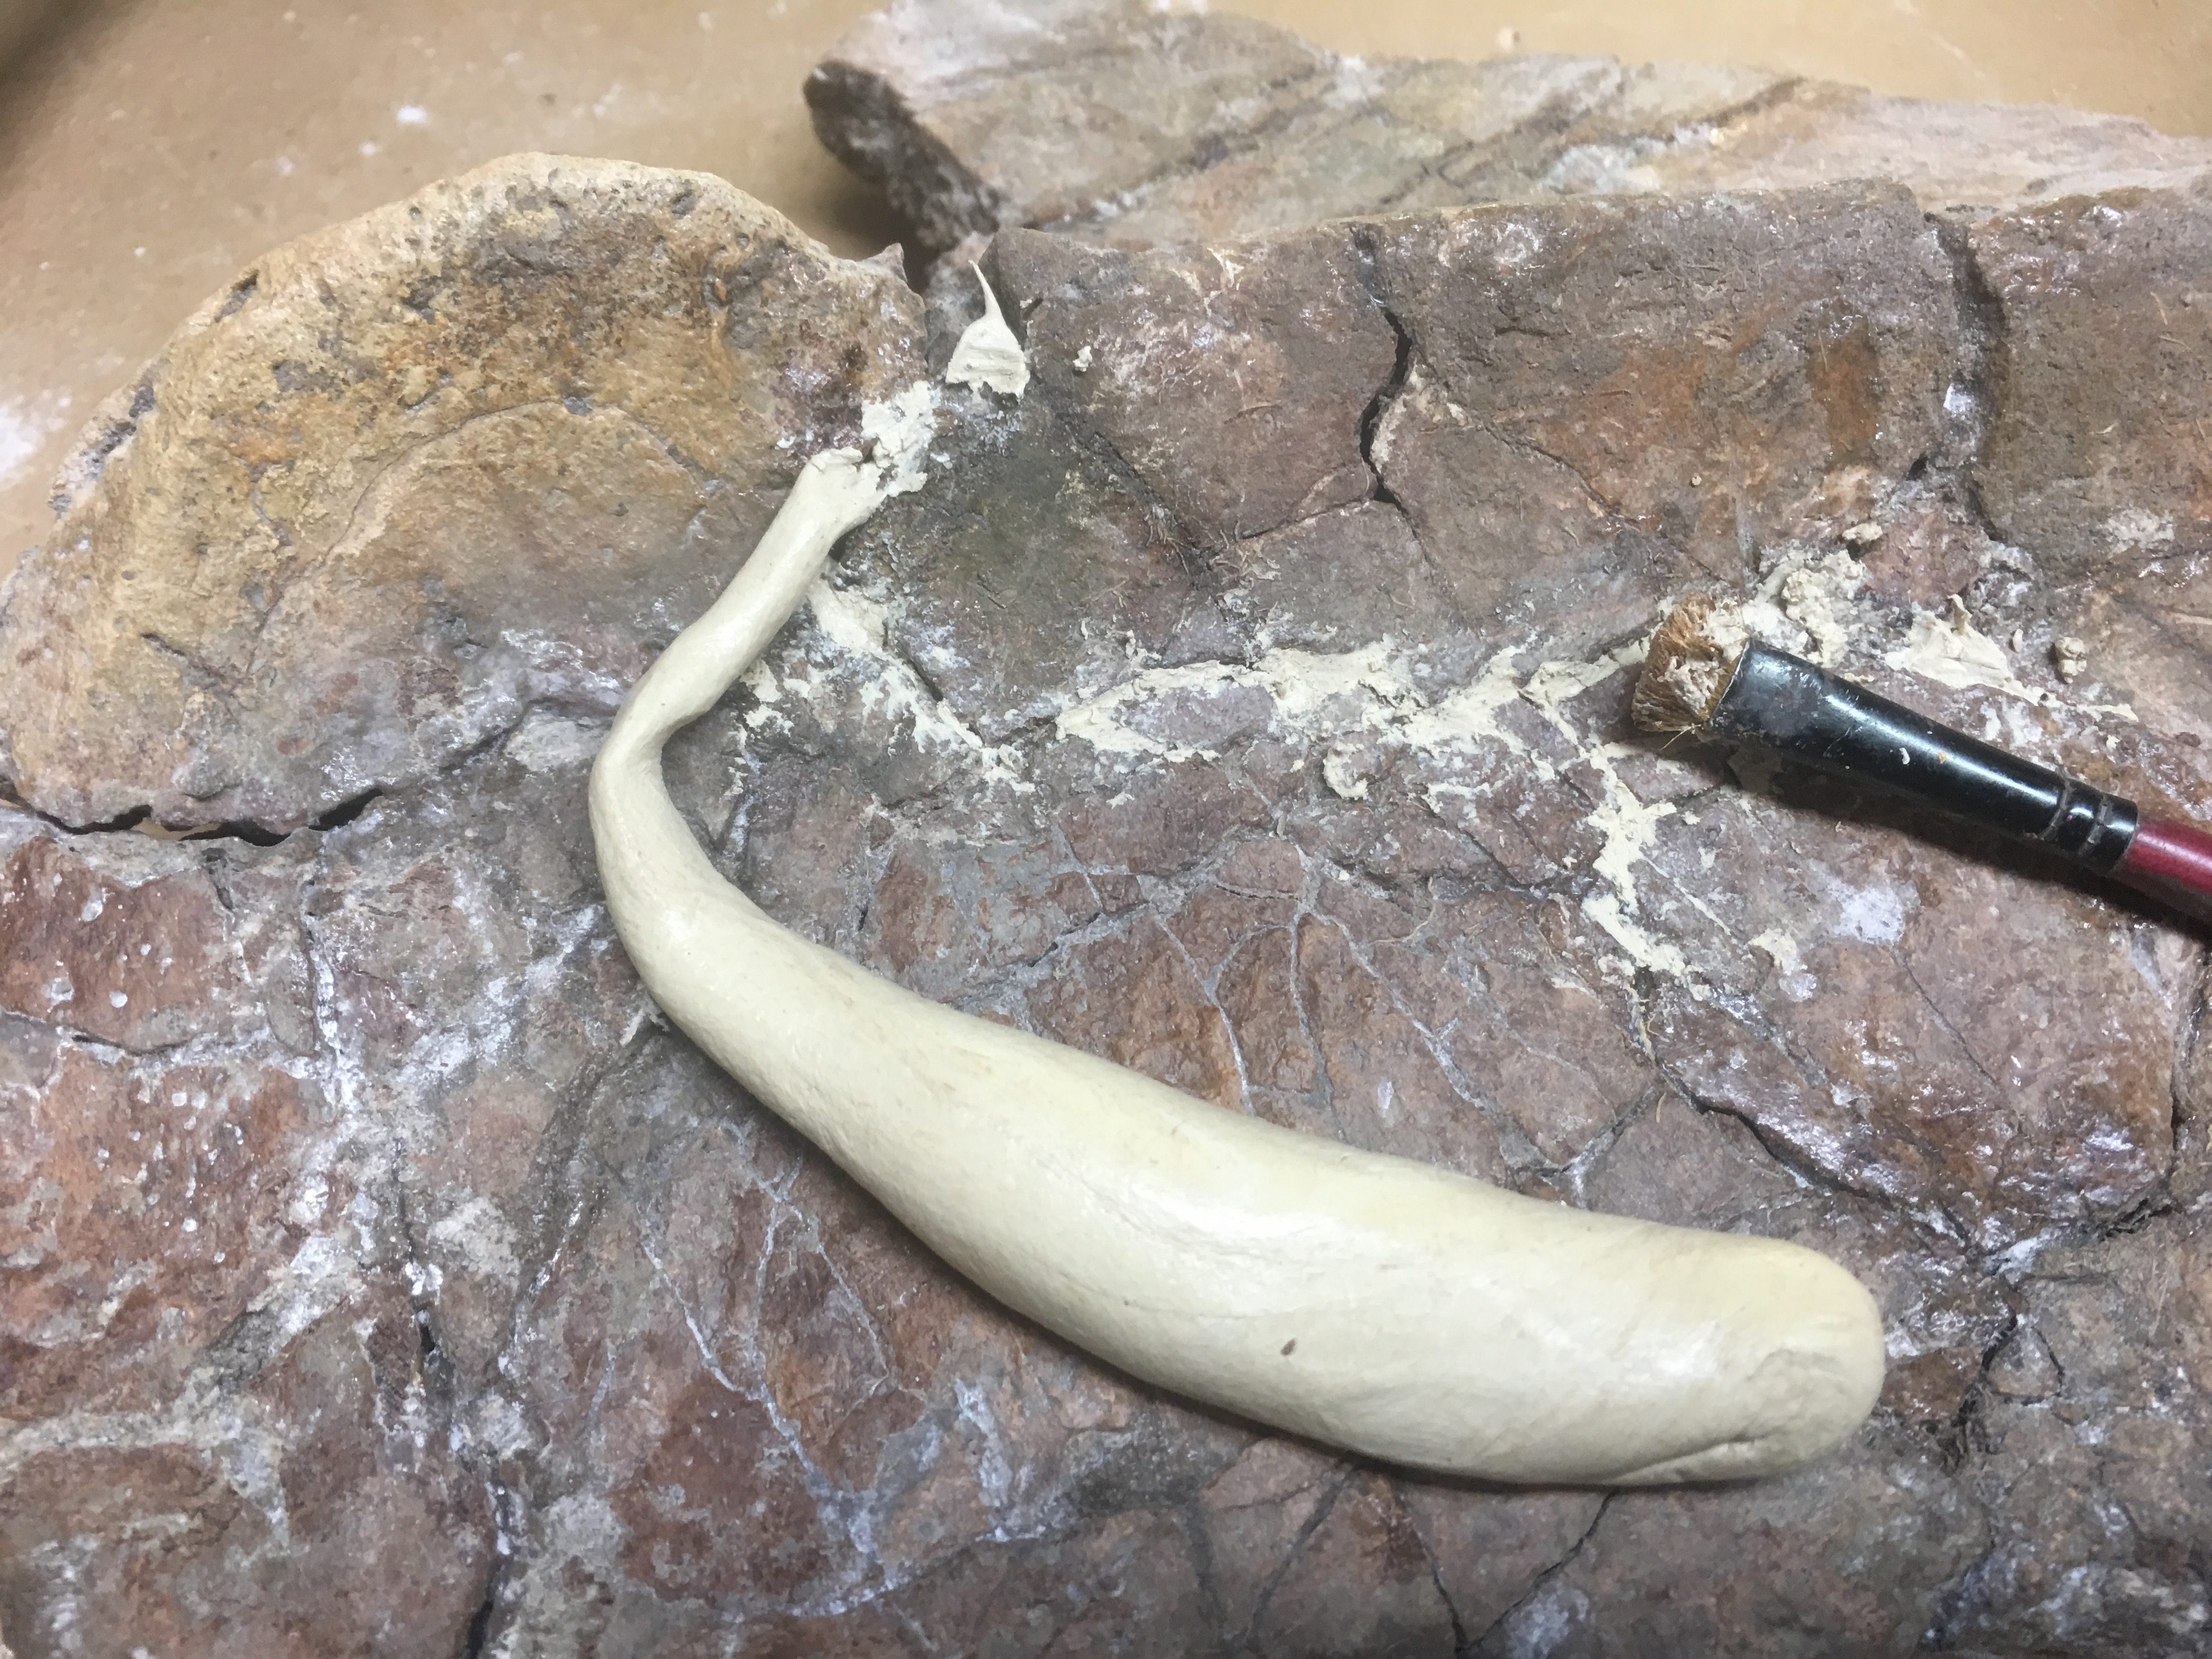
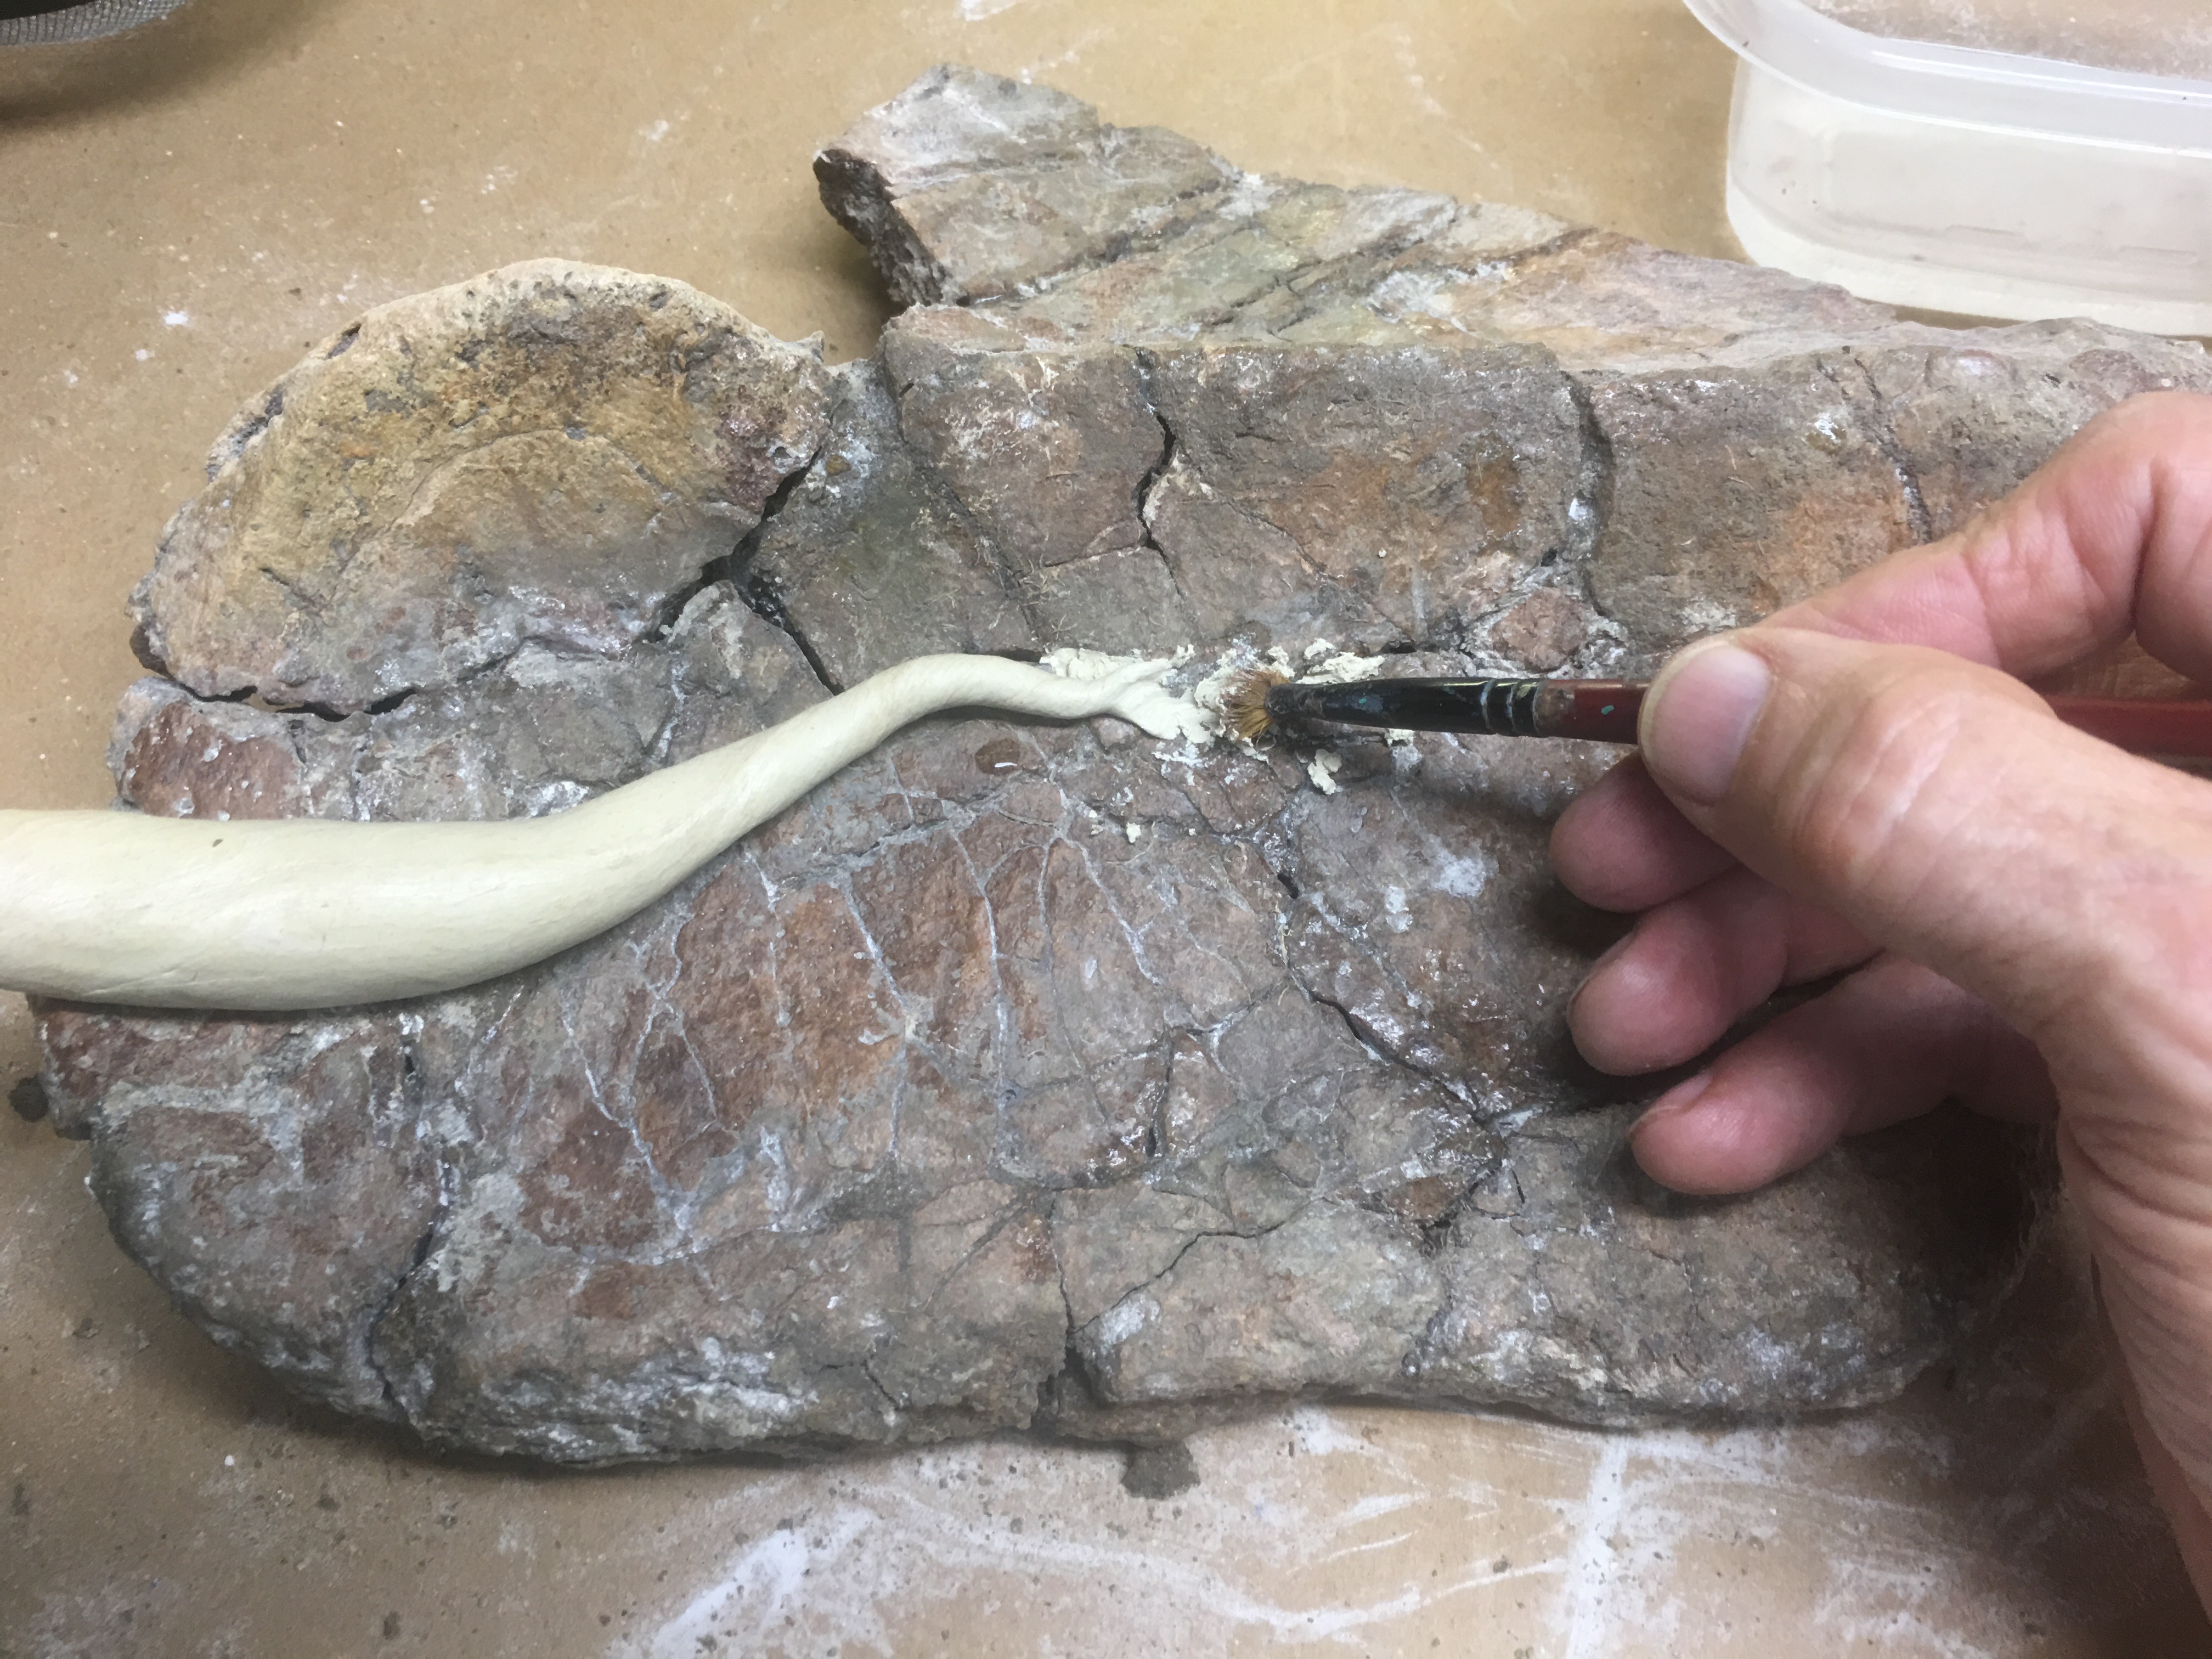
I roll the edge of this well blended mass again into a rope thinning at the tip down to 1/8 inch. I dip the end into water to create a more creamery substance to spread. I place the thinned end over the bone, press it into a crack, and smooth out as needed. See Prep Gallery below. To press out the epoxy I use and old artist paint brush that has been warn down to short stubby 1/8inch hairs or bristles. The ones you were going to toss out. It is stiff and leaves a rough surface texture. A very smooth patch looks unnatural. I develop a series of tools to texturize the surface such as press in patterns and rough sponges. Set the specimen aside to cure.
Stages 5 & 6
I return to the blaster to remove any excess epoxy that inadvertently covers clean bone and add texture to the surface of the epoxy patch. I repeat as needed until I am satisfied with a natural transition between the bone and the epoxy fill. You can stop hear or add a touch up. I work to touch up the added epoxy patches with dye or paint to be almost indistinguishable from the real bone. I take photos before and after this operation so that I can illustrate the extent of the restoration.
Remember: STABILIZE STABILIZE STABILIZE
To see what experts do check out some of the following web sites…..very impressive.
Fossil Prep Sites
http://preparation.paleo.amnh.org/assets/BurkeMuseumLabManual_Jan2010b.pdf
http://ftp.paleomethods.org/past-meetings/ewExternalFiles/Prepvolume.pdf
http://preparation.paleo.amnh.org/assets/Parks-Prep_of_small_vertebrate_fossils-Final.pdf
http://preparation.paleo.amnh.org/42/chemical
http://www.museum.unl.edu/research/vertpaleo/musnote2.html
http://www.thefossilforum.com/index.php?/topic/69739-best-tool-for-preparation-and-cleaning/
http://www.denverfowler.com/website/preparation.htm
https://www.fossilshack.com/fossilprep.html
https://www.floridamuseum.ufl.edu/vertpaleo/amateur-collector/preparation
http://preparation.paleo.amnh.org/35/techniques-in-the-field
https://www.khanacademy.org/partner-content/amnh/dinosaurs/dinosaur-fossils/a/fossil-preparation
Other Sites of Interest
https://www.dmns.org
https://www.fossilshack.com/fossilprep.html
https://archosaurmusings.wordpress.com/2011/02/22/darren-tanke%E2%80%99s-gorgosaurus-preparation-final-roundup/
http://www.geo-tools.com/fossil-preparation
